
I love EVERYTHING that has to do with lemon, but especially lemon CAKE! Lemon to me is bright, refreshing, and just screams SUMMER!
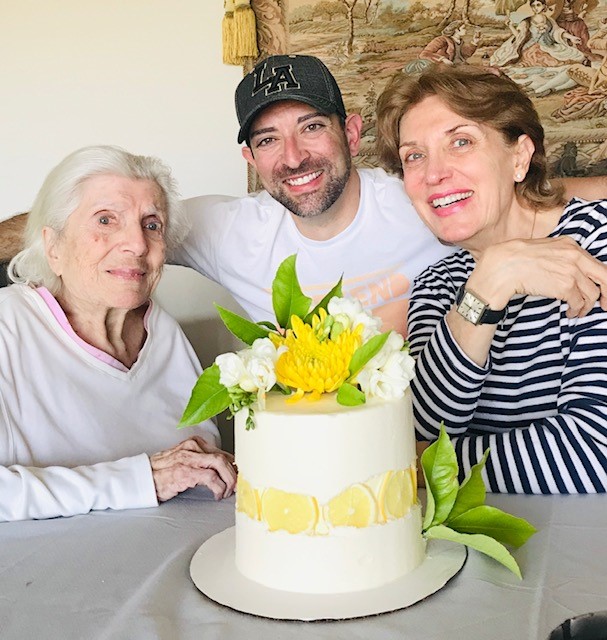
This recipe is near and dear to my heart because this was the cake that I made for my mom and grandma (who I call “Tati”) for Mother’s Day this year since lemon is one of their favorite flavors as well.
My mom has always been my rock and biggest supporter (if you know me, you KNOW I’m the biggest Mama’s Boy!), and Tati…. well, I just don’t know how my body has physically contained all the love I have for her without spontaneously combusting over the years.
Tati has always been there for me. I lost my biological father when I was only 4 months old, and my mom, 23 at the time, and I were living with her and my grandfather in Huntington Beach. Hearing stories and seeing various pictures, especially during my very early months leading up to about 3 yrs old, it was evident that Tati tried her hardest to help fill a void with me losing my father at such a young age.
She was the grandmother that ALWAYS called me her “little helper” in the kitchen, and after we moved out once my mom remarried, the one that took me to K-Mart EVERY time I came to visit so I could pick any new toy I wanted. She was the grandmother who I went on movie dates with (I have such fond memories of watching “The Lion King” and “Sister Act” with her when they first came out…. and yes, I realize I’m dating myself!). She was the grandmother who took me to the Huntington Beach High School swimming pool during the summer and would watch and cheer me on as I took those exhausting and intimating (!!) steps up to the highest diving board, only to awkwardly flop in. She was the grandmother who taught me her favorite card games, and belly laughed at my ridiculous excitement when I beat her for the first time. She was the grandmother whose chocolate/coconut cake still makes me drool, and the grandmother who instilled my love for baking at such an early age.
Tati is well into her 90’s now, and much like many individuals in her age group, has had her fair share of medical issues. For me, the toughest one that we are currently battling is her ongoing and worsening dementia. The hardest part is not being able to reminisce and laugh with her about these memories.
Thinking through this past Mother’s Day, and the day’s events, I think the biggest compliment I’ve ever gotten with regard to my baking was catching Tati (more than a handful of times) sneaking tastes of that vanilla buttercream frosting with her finger before we served it up. I can’t even put into words how PROUD I feel to have even a tenth of her talent and joy of baking.
If she’s taught me anything, it’s how to love by way of giving a simple hug or kiss, by spending time and committing to those you love, but even more so, how to express your love by way of baking.
I hope you enjoy making this cake as much as Tati had eating it (she had TWO slices!), and if you try it, please let me know what you think in the comments section below! Happy baking!
For this cake, I used one batch of my lemon cake recipe. Note that this lemon cake is very lemony as I use 4 teaspoons of lemon extract AND zest of 1 LARGE lemon (or 2 medium). If you prefer more of a delicate lemon taste, I’d recommend halving the amounts of lemon ingredients the recipe below calls for. Start with half, then taste the batter. If you want more of a lemon taste, add in the rest of the lemon ingredients. Remember, you can always add to a recipe, but you can’t take any ingredients away once incorporated!
For me, lemon and vanilla are like best friends that should never be apart. They just go hand in hand and so well together! For this cake, I used my American Vanilla Buttercream Frosting recipe, and actually made 1 1/2 batches of this frosting to ensure I had enough! Because I was testing out a new decorating technique, I wasn’t sure exactly how much frosting I’d need. Luckily I made just enough, so I’d definitely recommend making at LEAST 1 1/2 batches of this frosting!
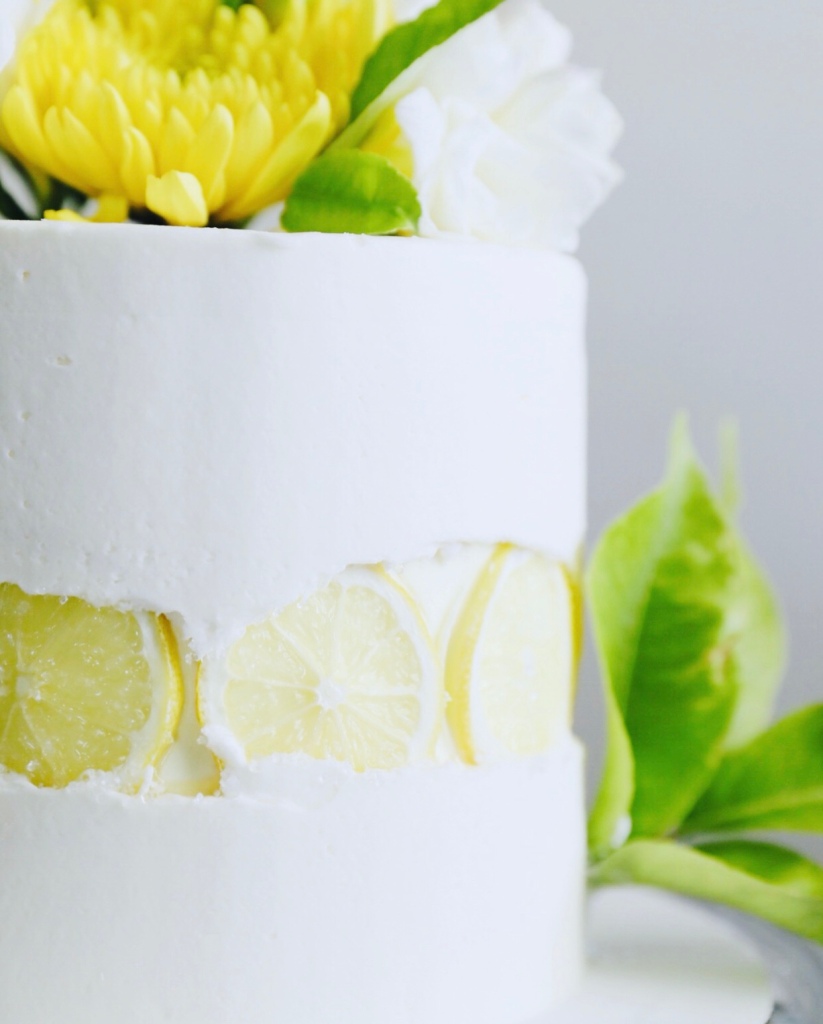
Now, for the fun part… how I decorated this cake! I knew I wanted it to scream simple elegance, and decorating with a white frosting was what I was envisioning. I get a lot of my inspiration from Instagram and Pinterest, and as of late, I came across a hot new trend with cakes… the Fault Line technique… that I had been ITCHING to try! The Fault Line technique is basically adding an extra layer of buttercream frosting, that you spread on the top and bottom the cake, and then use a bench scraper to smooth out that extra layer to get the effect you see in the picture. Between these 2 extra layers, you typically see sprinkles in the center, but for this cake, I decided to go a different route and placed lemons in the middle instead. I’ve included both my vanilla buttercream and lemon cake recipes below, and here are the steps I took to assemble the cake:
- Start by building your cake on a grease-proof cake board, at least 2-3 inches larger than the size of your cake. Using an offset spatula, place a dab of frosting in the center of your cake board, then gently spread around the very center of the cake board. This acts as the glue between your first cake layer and the cake board. Place the first cake layer on the cake board.
- You definitely want to use a cake board that is larger than your cake for easy handling. I always use a cake board that is 3 inches larger than my cake (so for example, if I’m making a 7 inch cake, I’ll build it on a 10 inch cake board.)
- Using an offset spatula, spread an even layer of buttercream frosting on top of your first cake layer, and all the way to the edge of your layer.
- Continue to stack and frost the next two cake layers, again spreading the frosting evenly and to the edge of the cake layer.
- Once you add your last even layer of buttercream frosting, place the last cake layer upside down (so the bottom of the layer is the very stop of the cake). Since the bottom of cake layers tend to have sharper edges, flipping the last layer helps to ensure the top of your cake will be even and have sharp edges as well.
- Using an offset spatula, apply a thin crumb coat of frosting around the sides and top of the cake, to fully cover, then using a bench scraper, smooth the buttercream. Note that you don’t have to use a lot of frosting during this step since the goal is to apply a thin crumb coat to capture and hold any cake crumbs in place. Once you apply and smooth out the crumb coat, chill your cake for about 10-15 minutes in the refrigerator until the frosting is firm when you touch it.
- Once your cake is nice and firm, again, using an offset spatula, apply a thicker layer of frosting around the sides and top of the cake (be liberal with this second layer of frosting since you will be removing most of it anyway). Once you cover your entire cake with frosting, use your bench scraper to smooth out the sides and top of your cake.
- Chill your cake in the refrigerator for another 10-15 minutes so the cake is, again, firm when you touch it.
- While the cake is chilling, thinly slice lemon slices (I used about 2-3 medium sized lemons) and once your cake is chilled, gently place and position the lemon slices in the center and all around your cake.
- Using your offset spatula, apply a thick layer of frosting above and below the lemons, as well as on the top of the cake, and smooth with both your offset spatula and bench scraper.
- As added decorations, I decided to put white and yellow flowers, plus some greenery, on top of and around the cake, but you can decorate with lemons, lemon slices, etc!
Cake Storage Instructions: I generally make my cake layers a few days in advance, but if you are planning to bake your layers and decorate in the same day, I would just be sure to give yourself enough time for the cake layers to FULLY cool. I have countless stories of trying to decorate my cakes with even slightly warm layers, and the results turned out to be a slippery “Leaning Tower of Pisa” disaster every time.
Once I take my cake layers out of the oven, here is my process:
I let the cake layers cool in their cake pans for approximately 20 min, then pop them out of their pans and onto a cooling rack for an additional 10-15 minutes or so. If you spray the pans well enough with a non-stick spray prior to baking, they should pop out with a gentle tap on the bottom of the pan; however, you may experience a stubborn layer here and there, so you may need to slide a butter knife around the edge of the cake layer to help separate the layer from the pan. I’ll then double wrap each layer with Glad Press’n Seal, and place them in a 1 pound Ziploc bag (I can generally fit 2 layers per bag). As you seal the Ziploc bag, try to remove as much air as possible from the bag since the goal is to try to keep the layers as fresh and moist as possible.
From here you can place in your freezer for up to 2 weeks, but again, if you need to decorate your cake the same day, just pop into your fridge for a couple hours to ensure your layers are as cool as can be! NOTE: if you do freeze your cake layers, be sure to take them out of the freezer about 20-30 minute in advance to thaw a bit, and bring them back to a cooler room temperature.
THE BEST Lemon Cake Recipe
Total Time: 40-50 minutes
Servings: 1 7-8 inch, 4 layer cake
Keywords: Lemon cake, lemon, cakes, cake, best lemon cake
Ingredients
- 3 cups all-purpose flour
- 3 cups sugar
- 2 1/2 teaspoons baking powder
- 1 teaspoon salt
- 2 sticks of butter, room temp (1 cup)
- 1 1/2 cup buttermilk, shaken
- 1 cup egg whites (I use pasteurized egg whites from a carton)
- 1/4 cup vegetable oil
- 4 teaspoons lemon extract
- Zest of 1 large lemon, or 2 medium size lemons
- 4-5 drops of yellow food gel (this is optional, but I like to add a little yellow color to this cake!)
Instructions
- Preheat the oven to 350 degrees F. Spay 4, 7 or 8 inch round baking pans with non-stick spray (I use PAM). Make sure to get a good coating on the bottom and around the sides. Line all four pans with parchment rounds cut the same size as the pans (7 or 8 inch).
- Sift the flour, sugar, baking powder, and salt into the bowl of a standing mixer fitted with a paddle attachment and mix on low speed until combined.
- Add in the butter, and mix until the mixture is nice and crumbly.
- In another bowl, combine the buttermilk, egg whites, oil, and lemon extract. With the mixer on low speed, slowly add the wet ingredients to the dry. Mix until ingredients are fully incorporated and combined, about 2-3 minutes. Scrape down the sides of the bowl and mix for an additional 30 seconds or so.
- Add in lemon zest and food coloring, and mix until fully incorporated, 1-2 minutes. Scrape the sides down one last time, and mix again for another 1-2 minutes.
- Divide and pour the batter evenly into the prepared pans and bake for 35-40 minutes, until a toothpick comes out clean. The cakes will start to pull away from the sides of the baking pan.
- Once your cakes have completely cooled, and are cold to the touch, use a cake leveler or serrated knife to level the tops of the layers, then frost away!
- NOTE: This cake does not dome like other cake recipes, so minimal (if any) cake leveling will be needed, since it bakes and cools fairly flat anyway! Also, be sure to review my storage instructions above for more information on my process!
Cake Recipe Notes
This cake recipe makes 1 7-8 inch, 4 layer cake cake. If you want to make a taller cake, you can also baking this recipe in 6 inch pans!
This recipe feeds about 25 people, possibly more depending on how you are cutting the cake.
To cut out my parchment rounds, I place a cake pan on a piece of parchment paper and outline the exact circle size I need using a food marker, then cut out.
When baking my cake layers, I set a timer about half-way (20 minutes) to the cooking time. Once the timer goes off, I turn my cakes 180 degrees, then set a timer for the remaining time (first set to 15 minutes, and if toothpick still comes out wet, set a new timer for 3 minutes and check again. Keep setting 3 minute timer intervals until the toothpick comes out clean).
Rotating your cake layers half-way helps to ensure even baking all around.
I usually bake my cake layers the day before so I’m not rushing to bake and decorate in the same day. It also lets the cake fully cool overnight and makes the decorating part that much easier. If you’re able to, and have the time, I highly recommend baking your layers in advance! Remember, this cake recipe can be made up to 2 weeks in advance if stored properly, and per the above instructions!
THE BEST Vanilla American Buttercream Frosting Recipe
Total Time: 5 minutes
Servings: 1 7-8 inch layer cake
Keywords: American buttercream, vanilla buttercream, vanilla frosting, buttercream frosting recipe, best buttercream recipe, buttercream flavors, air bubbles, crusting buttercream, easy buttercream frosting recipe
Ingredients
- 3 cups (6 sticks) unsalted butter, room temperature
- 8 cups powdered sugar
- 1/2 teaspoon salt
- 2 tablespoon cold heavy cream
- 4 teaspoon vanilla extract
Instructions
- Place butter in mixing bowl and beat on a medium speed for about 1 minute with a paddle attachment, until smooth and fluffy. SLOWLY add in powdered sugar, 1-2 cup at a time. You want to be sure you are adding the sugar slowly so as to not have a powdered sugar snow storm occur in your kitchen!
- (NOTE: If you forget to take your butter out of the fridge to reach room temperature, just microwave the butter for about 2 intervals of 10-15 seconds each. After first interval, turn butter so the bottom is now on top. But keep close watch to make sure the butter doesn’t melt!)
- Mix in heavy cream.
- Once fully mixed, add in vanilla and salt, and beat on low-medium speed until everything is fully incorporated. Scrape down the sides of your mixing bowl with a rubber spatula, and mix for another 1-2 minutes to ensure all ingredients have mixed and are fulling incorporated.
- If your frosting is too thick, mix in about 2-3 tsp of heavy cream until it reaches the desired consistency.
- If the frosting is too thin, mix in about 1/4 cup of powdered sugar until it reaches the desired consistency.
Frosting Recipe Notes
This recipe will cover 1 7-8 inch cake, or frost 12-16 cupcakes (depending on how much frosting you use).
